Two dumbbells, a living room floor, and twenty minutes. That's genuinely all it takes to start getting stronger at home — which is exactly why so many people quit in week three. Not because the exercises are hard, but because nobody told them how to progress, when to stop, and how to tell if any of it is working.
I've watched friends start a beginner strength training routine at home, burn out, restart, and quit again. And the pattern is almost always the same: they do the same eight bodyweight moves, at the same weight, at the same rep count, for six weeks. Then they get bored, feel no change, and stop.
Here's what I'll cover in this guide — the stuff that actually determines whether your home routine works: a structured multi-week progression plan, how to pick your minimal equipment, technique and safety for training alone, and the signals that tell you it's time to add weight or reps.
Key Takeaways
- Two full-body sessions per week is the floor for building strength — three is better, four is overkill for a beginner.
- Progressive overload doesn't mean "add more weight." It can mean more reps, slower tempo, less rest, or a harder variation of the same movement.
- A pair of adjustable dumbbells and one resistance band will carry you through your first six months. You don't need a rack, a bench, or a subscription.
- Training alone at home raises the stakes on warm-ups and tempo. Ten minutes of preparation prevents the injuries that derail beginners.
- You are progressing if the same weight feels easier, your reps climb, or you recover faster between sets — not because you "feel sore."
- Write your numbers down. The people who track are the people who stick with it past month two.
Why most home strength training routines fail beginners
Walk into any big-box gym and someone hands you a plan. Train at home and you're handed nothing but a YouTube rabbit hole. That gap is real, and it's the reason home training gets a reputation for being less effective than the gym.
It isn't. But the failure mode is different.
In a gym, your environment forces progression. The dumbbell rack has a heavier pair. Someone's using the squat rack. In your living room, nothing pushes you forward except your own plan — and if your plan is just "do some push-ups and squats," you'll plateau in four weeks and never notice.
The progression gap
Most free home workouts are frozen. They show you a set of exercises and stop there. What they never show you is the week-two version, the week-six version, or what to do when five push-ups stop being hard.
Progressive overload is the single mechanism that builds muscle and strength. Without a plan for increasing demand over time, your body has no reason to adapt. You'll get a little stronger in the first month — that's your nervous system learning the movement, not muscle growth — and then you'll stall.
The equipment confusion
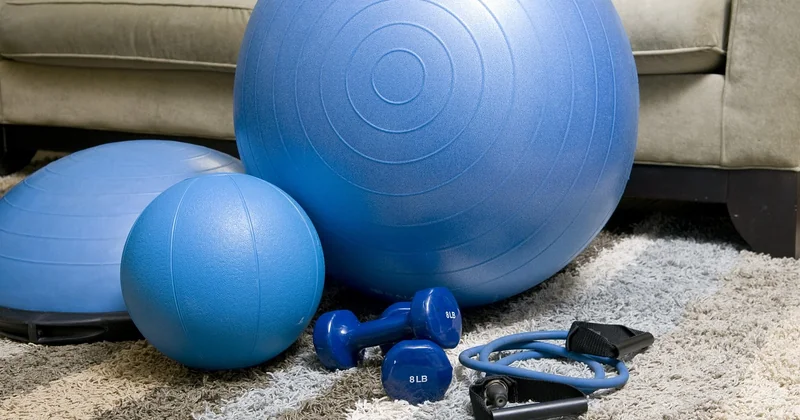
The other trap is buying the wrong thing. Beginners either buy nothing (and stall) or buy a home gym they'll never assemble. Adjustable dumbbells and one resistance band sit in the sweet spot. That's it to start.
What you actually need to start
Before you touch a single exercise, get clear on the tools. This is where most people overspend or under-prepare.
| Equipment | Why it matters | Rough starting point |
|---|---|---|
| Bodyweight only | Zero cost, zero setup. Perfect for the first 3–4 weeks while you learn movement patterns. | Nothing — start here |
| Adjustable dumbbells | Load progression in one purchase. Replaces an entire rack. | A pair covering roughly 10–50 lb per hand |
| Resistance band | Cheap accessory work, warm-ups, and glute/hip activation you can't easily hit with dumbbells alone. | One medium-strength loop band |
| A floor mat | Keeps your spine off hard floors during floor presses and core work. Optional but genuinely useful. | Any 6mm mat |
If you're starting with nothing, that's fine. Bodyweight training absolutely builds strength — for a beginner, it's often enough for the first month. Add the dumbbells when push-ups and squats feel controlled rather than shaky.
One thing I'd push back on: don't buy a barbell set to start. Beginners consistently overestimate how quickly they'll need it and underestimate how much a barbell demands in technique and space. Adjustable dumbbells get you 90% of the way for a fraction of the footprint.
What about training without any equipment at all?
It works, and it works longer than people think. Push-ups, squats, lunges, glute bridges, and inverted rows under a sturdy table cover every major muscle group. The limitation isn't the exercises — it's that bodyweight training gets hard to progress once push-ups and squats become easy. At that point you either add load or move to harder variations (single-leg squats, archer push-ups, elevated feet).
Your beginner strength training routine at home
This is the structure I'd hand a friend starting from zero. Two full-body sessions per week to start. If you recover well and want more, add a third session rather than lengthening the existing ones.
The four-week progression plan
Weeks 1–2 — learn the movements. Three sets of each exercise, stopping 3–4 reps short of failure. This isn't supposed to be brutal. You're teaching your body the patterns.
- Bodyweight squat — 3 × 10
- Wall or incline push-up — 3 × 8
- Glute bridge — 3 × 12
- Inverted row (table or sturdy bar) — 3 × 8
- Dead bug or plank hold — 3 × 20 seconds
Weeks 3–4 — add a little load. Now introduce dumbbells where it makes sense. Goblet squats, dumbbell floor presses, dumbbell rows. Slightly higher reps, same rest.
- Goblet squat — 3 × 12
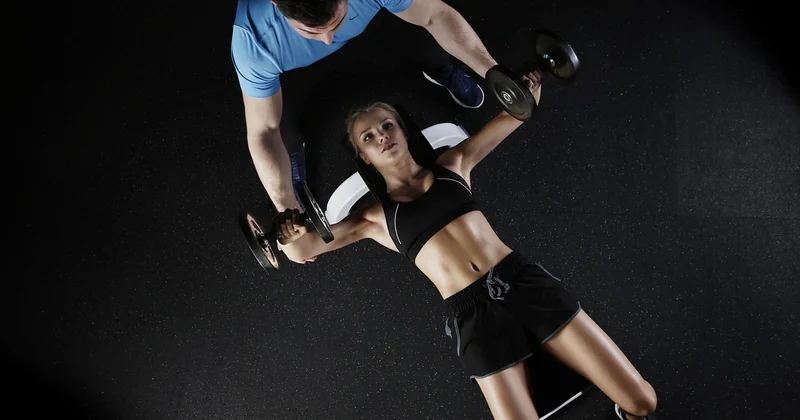
- Dumbbell floor press — 3 × 10
- Dumbbell row (one arm at a time) — 3 × 10 per side
- Reverse lunge — 3 × 8 per leg
- Plank — 3 × 30 seconds
Weeks 5–8 — progress the load. This is where the real gains show up. Add weight, add a rep, or slow your tempo — pick one variable to increase per week. If you're not sure how much, add the smallest increment your dumbbells allow and see how it feels next session.
A caution that took me too long to learn: don't advance all three variables at once. I once tried adding weight and reps and a fourth set in the same week. I was wrecked for days and had to restart the cycle two weeks back. One change per week is plenty.
How to warm up when you're training alone
Beginners at home skip warm-ups far more often than gym-goers do, because there's no one watching and no class schedule to follow. Don't.
Five to eight minutes is enough:
- Light cardio — jumping jacks, marching in place, brisk walking
- Hip and shoulder circles, controlled and slow
- Two lighter "warm-up sets" of the first exercise in your workout
The warm-up sets matter more than the cardio. Doing a few squats with no weight before you load a goblet squat primes the exact muscles and joints you're about to use.
Technique and safety for the solo beginner
No spotter, no coach, no mirror telling you your knee is caving. That's the honest challenge of home training, and it deserves real attention.

The three technique rules that matter most
Brace your core before every rep. Not "suck in your stomach" — brace like you're about to be gently poked in the gut. This protects your lower back during squats, deadlifts, and rows, and it's the single most useful skill a beginner can learn.
Control the descent. Most beginners let gravity do the lowering and only "work" on the way up. Slow the lowering phase to 2–3 seconds on every exercise. You'll build more strength with less weight, and you'll feel immediately whether your form is holding.
Stop 2–3 reps short of failure mentally, not physically. Training alone, you can't afford to grind out reps until your form collapses. Leave a little in the tank. That's not weakness — it's how you train consistently without hurting yourself.
Common beginner mistakes at home
- Training to soreness, not to progress. Soreness is a side effect, not a goal. Some of your best sessions will leave you barely sore at all.
- Changing the routine before it's had time to work. Give a plan six weeks minimum before you decide it isn't working.
- Skipping unilateral work. Single-leg and single-arm exercises expose and correct the strength imbalances that build up quietly in home training.
- Holding your breath through hard reps. Breathe out on effort, in on the return.
How to know you're actually progressing
This is the question that separates people who stick with it from people who quit. Progress at home is quieter than it is at the gym, so you need signals you can track.
The signals worth watching
The same weight feels easier. You pick up the dumbbell you struggled with two weeks ago and it moves with less effort. That's strength.
Your reps climb without form breaking down. Going from 10 to 14 controlled reps at the same weight is real progress — arguably more meaningful than adding weight.
You recover faster between sets. If you used to need 90 seconds to feel ready and now you need 60, your conditioning and strength are both improving.
You need new variations. When a movement stops challenging you, you've outgrown it. That's a good problem.
How to track without overcomplicating it
You don't need an app. A notebook works fine. Write down three things after every session: the exercise, the weight or variation, and the number of reps you completed. That's it. Next week, you'll know exactly what to beat.
I ignored this for my first several months and it cost me. I had no idea whether I'd gotten stronger, because I had nothing to compare against. Two years into home training, a single sheet of paper per week is the only tool I'd never give up.
Adapting the routine if you're starting from zero
Not everyone starts at the same place. If you've been sedentary for years, carry extra weight, or deal with joint pain, the principles don't change — the entry point does.
Regression variations for every movement
- Squat → sit-to-stand from a chair, or squat to a chair's edge
- Push-up → push-up against a wall, then against a counter, then on the floor
- Row → band pull-apart, then inverted row at a steeper angle
- Plank → knee plank, then forearm plank, then full plank
Each step back is still strength training. The point is to make the movement challenging but not painful. If a joint hurts — not the muscle, the joint — regress further or stop and check with a professional.
For women specifically, the routine doesn't need to look different. The common myth that women should train lighter and do more reps has no basis in how muscle responds to load. Train the same movements, progress the same way. If anything, the hip and glute work that's often underemphasized in general programs is worth prioritizing, because it carries over into everyday movement more than almost anything else.
Where to go from here
The uncomfortable truth about home strength training is that the exercises barely matter. What matters is whether you show up twice a week, write down what you did, and adjust one variable at a time.
Most beginners spend weeks hunting for the "perfect" routine and never finish six. The imperfect routine you actually follow, week after week, will out-build the perfect one every time.
So start this week. Two sessions. Bodyweight only if that's your equipment. Write your numbers down. Come back in six weeks and look at what changed — you'll probably be surprised by how much, and it won't be because of anything clever. It'll be because you kept a promise to yourself twice a week, alone in your living room, when no one was watching.